
CATMA Standalone is a version of CATMA that can be run independently of the publicly accessible web application. It is designed for users who want to run CATMA on their local machine or in a private network (and where internet access might not be available).
Possible reasons for running CATMA in this way include:
- Wanting to work with sensitive data that must not be transferred outside a particular location for legal, regulatory, or other reasons (for example, interviews, surveys, medical information, etc.)
- Wanting to work with data that is not available publicly due to copyright restrictions and that must not leave a controlled environment (for example, in a national library)
- Wanting to use CATMA in ways that could overload or otherwise negatively impact the publicly accessible web application
- General privacy concerns in relation to using internet services
By default, CATMA Standalone is configured for single-user use and will not perform well with multiple users or under heavy load. However, experienced users are able to change certain parameters and/or modify the configuration to make a deployment more suitable for such scenarios, as described below. (Future versions are envisaged to provide better support for multi-user deployments.)
Additionally, some features and functionality are not available or will not work without additional configuration (for example, new user registration and emails, including invitations, or the option to log in with a Google account).
Lastly, bear in mind that running CATMA yourself comes with certain risks. For example, you don't benefit from the automatic backups that we create if you use the public instance. If you do something wrong, you could lose your work forever! Users accept full responsibility when using CATMA Standalone. Also see the Backups and Updates & Security sections.
CATMA Standalone is provided as a Docker image. If you are unfamiliar with Docker, you can read up on some basics here.
Containers created from the image include a GitLab server instance (functioning as CATMA's backend), as well as the CATMA application itself. Theoretically, we might be able to remove the dependence on GitLab for single-user CATMA Standalone deployments in a future version, thereby reducing the resource requirements, however this is not a trivial undertaking.
For local machine deployments, you will need to download and install the Docker Desktop application: https://www.docker.com/products/docker-desktop/
For server deployments, Docker Engine or a compatible container runtime should be used instead.
CATMA Standalone has been tested and found to work acceptably with Docker having access to at least 4 CPUs and 6 GBs of RAM (assuming these are not shared with other containers). We do not recommend, nor will we provide support for deployments with less than this.
To fetch the image, execute the following in your terminal / command prompt:
docker pull maltem/catma-standalone:latest
Next, choose your deployment scenario and follow the instructions:
To start the container the first time, execute the following in your terminal / command prompt (this will fetch the image if you don’t already have it):
docker run -it --add-host=gitlab.localhost=127.0.0.1 --publish 127.0.0.1:8088:8088 --publish 127.0.0.1:8089:8089 --volume gitlab-config:/etc/gitlab --volume gitlab-logs:/var/log/gitlab --volume gitlab-data:/var/opt/gitlab --volume catma-logs:/opt/jetty_web/catma_base/logs --volume catma-jetty-temp:/opt/jetty_temp --volume catma-data:/data/catma --stop-timeout 30 --name catma-standalone maltem/catma-standalone:latest
To start the container again at a later stage, execute the following in your terminal / command prompt:
docker start -ai catma-standalone
Upon starting the container you should see the following:
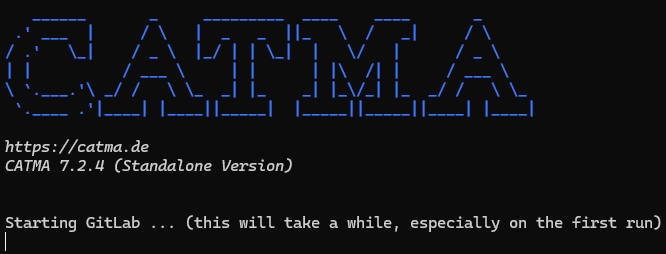
Especially the first time you start the container, it will take a few minutes for everything to start up, varying depending on hardware and resources available to Docker. Subsequent starts should be a bit faster.
Eventually, you should see the following:
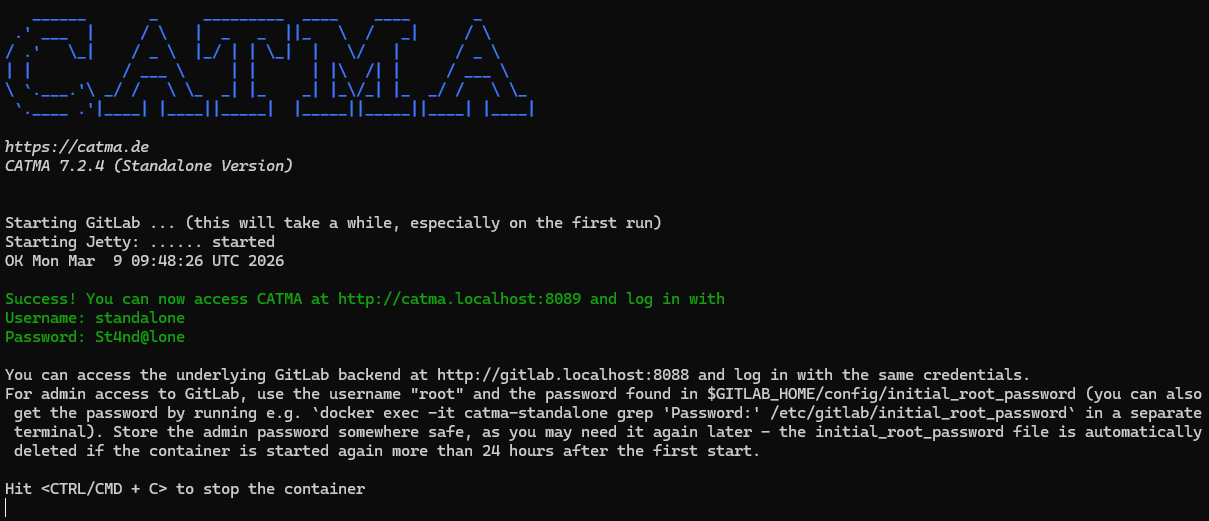
You can now access CATMA and the underlying GitLab backend at the URLs displayed and log in as described.
You can change certain parameters when you start the container the first time. To do so, add --env <key>=<value> arguments to the docker run command.
LOW_MEM
Enabling this option (e.g. --env LOW_MEM=true) causes the GitLab server to be configured to have an even smaller memory footprint. Note however, that this
will be at the expense of performance and result in a significantly longer startup time.
JETTY_JAVA_OPTIONS
By default, we set very conservative minimum (1 GB) and maximum (2 GB) memory limits for the Jetty server (that is the server that makes the actual CATMA
application available). You can modify these limits, for example: --env JETTY_JAVA_OPTIONS="-Xms2g -Xmx4g" (2 GB min., 4 GB max.).
If port 8088 or 8089 are already in use on your machine, Docker may complain or you may simply not be able to access CATMA or its GitLab backend at the displayed URLs. You can change the port numbers when you start the container the first time. To do so:
- Modify the port number between the colons of the corresponding
--publishparameter (e.g.: "--publish 127.0.0.1:8088:8088" → "--publish 127.0.0.1:8090:8088") - Add an
--envparameter setting the value of eitherCATMA_PORTorGITLAB_PORTto match (e.g.: "--env CATMA_PORT=8090")
The first --publish parameter publishes the port of CATMA – 8088 by default. The second publishes the port of GitLab – 8089 by default.
Sometimes, especially when the resources available to Docker are constrained, it can happen that GitLab fails to start properly. An informational message will be displayed if GitLab is not running after a few minutes, including steps that you can take to troubleshoot the problem:
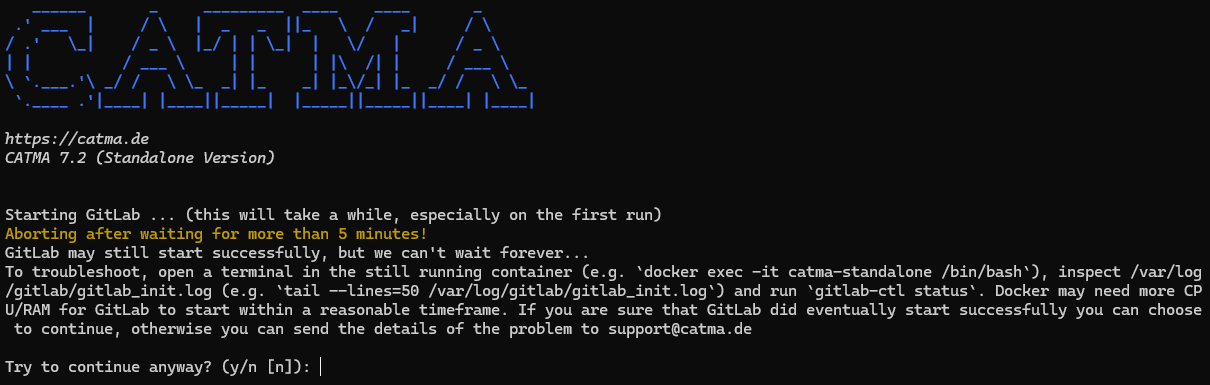
It might be enough to simply try again before spending time on analyzing the cause. To do so, answer "n" to the prompt to continue anyway and wait for the container to stop, then start it again as before.
If it was the first time you tried to start CATMA Standalone (i.e., you executed docker run and not docker start), you will need to remove the container
before trying again. To make sure that we're starting from a clean slate, we'll remove the associated volumes too. (NB: Only remove the volumes if you
haven't done any actual work with CATMA – they contain your data and can't be recovered once removed! You can find further information about volumes
below.)
docker rm catma-standalonedocker volume rm gitlab-config gitlab-logs gitlab-data catma-logs catma-jetty-temp catma-data-
docker run ...(see above for the full command)
If you ran docker exec -it catma-standalone grep 'Password:' /etc/gitlab/initial_root_password but the password was not displayed, you can try the following
instead:
-
docker exec -it catma-standalone /bin/bash(opens a terminal within the container) grep 'Password:' /etc/gitlab/initial_root_password- Hit
CTRL/CMD + Dto disconnect from the terminal within the container
If you see an error like grep: /etc/gitlab/initial_root_password: No such file or directory then the container was started again more than 24 hours after the
first start, and the initial_root_password file was automatically deleted by GitLab. You can open a terminal within the container as in step 1 above and
reset the root password. Alternatively, if you don't have any data that you
want to keep, you can simply delete the container and its associated volumes and start fresh (see Gitlab Fails to Start).
You can think of Docker volumes like external hard disks that you plug into a computer: they give a container a place to write data that is independent of the container itself. This means that a container can be deleted without affecting – in this case – the CATMA and underlying GitLab data. The container can later be re-created with the same volumes and access the same data. This is particularly important for updates, as it allows containers based on an older version of a Docker image to be deleted and re-created based on a newer version, while keeping all important data.
If you run into any problems while using CATMA Standalone, feel free to contact us at support@catma.de
If you are considering a server deployment then we assume that you have some experience with IT administration and containerization, therefore we will keep this section brief. Some of the information from the Troubleshooting & Further Information section under Local Machine Deployment may also be helpful.
The instructions for Local Machine Deployment use Docker-managed named volumes for simplicity. As you probably want more control over the location of, and also direct access to, the data on the host machine, we recommend that you create some directories for the volumes, which can then be bind-mounted. For example:
sudo mkdir -p /srv/gitlab /srv/catma-
export GITLAB_HOME=/srv/gitlab CATMA_HOME=/srv/catma(you probably want to do this in the appropriate user's shell profile or set system-wide environment variables)
Remember to set appropriate ownership and permissions for these directories, depending on your environment.
Although containers started from this image don't generate much direct output, you may want to use Docker's 'local' logging driver: https://docs.docker.com/engine/logging/configure/
docker run -it --add-host=gitlab.localhost=127.0.0.1 --publish 127.0.0.1:8088:8088 --publish 127.0.0.1:8089:8089 --volume $GITLAB_HOME/config:/etc/gitlab --volume $GITLAB_HOME/logs:/var/log/gitlab --volume $GITLAB_HOME/data:/var/opt/gitlab --volume $CATMA_HOME/logs:/opt/jetty_web/catma_base/logs --volume $CATMA_HOME/jetty_temp:/opt/jetty_temp --volume $CATMA_HOME/data:/data/catma --stop-timeout 30 --name catma-standalone maltem/catma-standalone:latest
Once everything is up and running, you can detach your terminal from the container using the CTRL-p CTRL-q key sequence.
See the official Docker documentation for how to start containers automatically.
As mentioned under limitations, the image was built under the assumption that it will primarily be used for local access. Additional configuration steps are required if you plan to make your instance accessible more broadly and to multiple users.
To expose CATMA and/or GitLab beyond the host machine, you could set up a reverse proxy and/or modify the --publish parameters to change the host ports and
the interface they are published on (or use --expose instead if the reverse proxy is also a container on the same internal network). Also see the *_PORT and
*_URL environment variables in the Dockerfile and how these are used.
For exposure to the internet you should definitely set up a reverse proxy and terminate SSL connections at the proxy. In that case, set the *_URL environment
variables to the real, external URLs, and treat the *_PORT environment variables as the internal ports only. Also see the
Updates & Security section.
Modify the following to make your deployment more suitable for multi-user use (will require a container restart):
- Set significantly higher minimum and maximum memory limits for the Jetty server via the
JETTY_JAVA_OPTIONSenvironment variable, and make sure that you haveLOW_MEM=false(the default) – see the Dockerfile - Edit
$GITLAB_HOME/config/gitlab.rb(or/etc/gitlab/gitlab.rbwithin the container) and comment thepuma['worker_processes']andsidekiq['concurrency']lines at the end of the file, so that the defaults will apply
To enable user registration, edit $CATMA_HOME/data/catma.properties (or /data/catma/catma.properties within the container) and set the following
properties (see the reference file here):
DEV_MAIL_LOG_ONLY=falseMAIL_*SIGNUP_TOKEN_KEYGOOGLE_RECAPTCHA_*
Alternatively, regular email/password-based user accounts can be created directly within GitLab. By default, creating user accounts using the GitLab admin interface requires GitLab to be configured to be able to send emails, because email confirmation is a strict requirement. You can change the email confirmation settings at: Settings → General → New user account restrictions. User accounts can also be created directly using the GitLab API.
To enable Google account logins, edit catma.properties and set the GOOGLE_OAUTH_* properties. You will also need to configure the GitLab OmniAuth
settings in gitlab.rb as follows:
gitlab_rails['omniauth_allow_single_sign_on'] = ['google_oauth2']
gitlab_rails['omniauth_sync_profile_from_provider'] = ['google_oauth2']
gitlab_rails['omniauth_sync_profile_attributes'] = ['email']
gitlab_rails['omniauth_auto_link_user'] = ['google_oauth2']
gitlab_rails['omniauth_providers'] = [
  {
    "name" => "google_oauth2",
    "app_id" => "<your-oauth-client-id>",
    "app_secret" => "<your-oauth-client-secret>",
    "args" => { "access_type" => "offline", "approval_prompt" => "" }
  }
]
We may publish updated versions of the Docker image from time to time. This could be because there is a new version of CATMA or GitLab, with new or improved features, as well as bug and security fixes.
If you are running a server deployment and exposing the services, especially if you are exposing them to the internet, we strongly recommend that you keep your version up to date so that you have the latest security fixes for both CATMA and GitLab. GitLab releases security updates at least twice a month, however please note that we may skip or delay certain updates according to our own risk assessment, or for other reasons. Furthermore, updates to the Docker image may occur significantly later in comparison to the publicly accessible web application.
When using CATMA Standalone, you accept full responsibility for the security of your IT systems and infrastructure, in accordance with CATMA's Terms of Use.
If you have any questions or concerns related to the security of CATMA Standalone, feel free to contact us at support@catma.de
Generally speaking, the update process is quite safe and you shouldn't lose any data. However, we still recommend that you create a backup first!
To get the latest version of the image, simply re-run the docker pull command as shown in the Setup & Usage section. The output of the
command will tell you if anything new was fetched.
If you don't have any data that you want to keep, you can simply delete the container and its associated volumes and start fresh (for local machine deployments, you can follow the steps under Gitlab Fails to Start).
If you want to keep your data, the update process may be more complicated than switching directly to the latest version. This is because the GitLab server may also have been updated, and sometimes it isn't possible to skip some intermediate GitLab versions. Before proceeding, you should check this page to see whether we have published any versions of the image between the one that you have now and the latest one (the "latest" tag is always an alias for an actual version tag).
If there are intermediate versions, but the GitLab version hasn't changed, you can update straight to the latest version. (Our version tags are structured
as follows: <CATMA version>-gl<GitLab version>. For example, for the CATMA Standalone image tagged 7.2.4-gl18.8.4, the GitLab version is 18.8.4.)
If the GitLab version has changed, you may need to update to some or all intermediate GitLab versions in sequence! Additionally, you need to wait for all GitLab background migrations to be finished before updating to the next version (Monitoring → Background Migrations in the admin interface). GitLab also provide a tool that you can use to check whether it is safe to skip certain versions.
These are the steps to update to a newer version:
- Check for running background migrations as mentioned above
- Stop the container if it is running:
docker stop catma-standalone - Remove the container:
docker rm catma-standalone(remember that your data is safely stored within the volumes) - Pull the new image:
docker pull maltem/catma-standalone:<version>(substitute the<version>placeholder with an actual version tag) - Create a new container using the same
docker runcommand that you used previously, but specify the exact image version at the end (for example,maltem/catma-standalone:7.2.4-gl18.8.4instead ofmaltem/catma-standalone:latest) - Wait for everything to start up, confirm that everything is still working, then repeat the process if necessary until you are at the latest version
Once done, you can delete old and unused image versions to save space (list images with docker images and remove them with docker rmi <tag-or-id>).
For local machine deployments, one of the easiest ways to create a backup is by using CATMA's built-in export functionality. See our FAQ entry How can I export resources from the Project module?. The exported documents, annotation collections, and tagsets can later be imported again. This method is suitable if there is only a small number of projects. Also note that this kind of export does not include comments created using CATMA's comment feature, project activity logs, or additional user accounts that may have been created in GitLab.
Alternatively, see the official Docker documentation for how to back up, restore, or migrate data volumes. Backing up the volumes will ensure that absolutely all data is backed up.
For server deployments, if you use bind mounts instead of named volumes as suggested, you can simply back up the GITLAB_HOME and CATMA_HOME directories on
the host machine. You may also be interested in creating a self-contained backup of only GitLab: https://docs.gitlab.com/install/docker/backup/
If you would like to build your own CATMA Standalone image, for example, with your own build of CATMA, or to make some other change, refer to the Dockerfile.